Publishing Jupyter Book on GitHub Pages#
This guide explains how to publish your Jupyter Book online using GitHub Pages.
1. Install Git and GitHub Desktop#
Download and install Git.
Download and install GitHub Desktop.
2. Create a GitHub Repository#
Go to GitHub and sign in.
Click New repository and create a new repository (e.g.,
my-jupyter-book).
3. Clone the Repository#
Open GitHub Desktop.
Click File > Clone repository and select your new repository.
Choose a folder to clone the repository to your computer.
4. Copy Book Files#
Copy all files and folders (including
_build/html) from this Jupyter Book project into the cloned repository folder.
5. Update the Repository URL in Configuration#
Open the
_config.ymlfile in your project.Find the following section:
repository:
  url: https://github.com/fum-cs/jupyter-book-tutorial  # Online location of your book (change this to your GitHub repository link)
Change the
urlto match your own GitHub repository address (for example,https://github.com/<username>/<repository>).
6. Commit and Push Changes#
In GitHub Desktop, you should see the new files listed as changes.
Add a summary (e.g., “Add Jupyter Book files”) and click Commit to main.
Click Push origin to upload your changes to GitHub.
7. Publish with ghp-import#
Open the Command Prompt in your repository folder.
Run the following command to publish your book to GitHub Pages:
ghp-import -n -p -f ./_build/html
This will create a
gh-pagesbranch and publish your site.
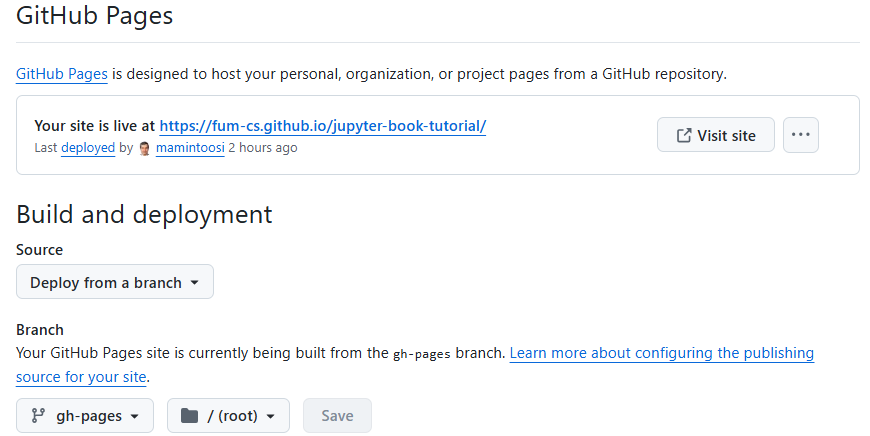
8. View Your Book Online#
Go to your repository on GitHub.
Click Settings > Pages.
Your site will be available at the URL shown there (usually
https://<username>.github.io/<repository>/).
9. Update Your Book After Changes#
If you make any changes to your book content:
Rebuild the book:
jupyter-book build ./
Run the
ghp-importcommand again to update the published site:ghp-import -n -p -f ./_build/html
Commit and push any other changes to your repository if needed.